We have had a lot of people ask us how to record a podcast remotely. So we decided to write a blog post outlining everything you need to know!
The Covid-19 pandemic and the successive lockdowns that followed have made remote recording a real necessity for podcasters. 💻 🎧
Until life gets back to normal – and as long as social distancing is the rule – remote recording is the only way to continue publishing episodes regularly.
But while this trend has really grown in popularity among podcasters with the health crisis, it’s a practice that existed before and is likely to continue even after the pandemic.
Because, with or without lockdown, you may need to record your podcast remotely at any time; either because you’re co-hosting your show with someone who lives far away, or because your guests couldn’t travel (or you don’t have the budget to pay for a train ticket for example 😉).
For this, you need to have a bit of preparation to avoid a collective fiasco! But don’t worry, to make sure it goes well, we explain everything here! 🚀

Good equipment is the key to record a podcast remotely
Making a quality podcast (whether it’s recorded remotely or not, by the way) depends on the podcasting equipment you have. For this first step of preparation for remote recording, you must therefore evaluate not only your own audio equipment but also the equipment of your guest(s).
✌️ 2 scenarios exist:
Your guests are not podcasters and have no specific equipment 🙅♀️
In this case, you should guide them on how to equip them. For example, ask them to wear headphones during your interview or at least headphones with a podcast microphone close to the mouth. It will do the trick, although they produce a lower quality sound.
On the other hand, they should avoid wireless headphones with a microphone very far from the mouth, or computer microphones that create a mediocre sound, as if they were in a cave…
If they can, they should set their cell phone in front of them and select the app on their phone that does recordings. On an Apple phone, this is called the Voice Memos app. Make sure they press “record” at the start of the interview. Then, at the end of the interview, they can save the recording and email it to you. Sometimes the recordings on the phone app will turn out better than the recordings on your computer!
Your guests have recording equipment
If you are recording remotely with another podcaster or with someone who has good equipment, invite them to record their track on their own with their own audio equipment and software. 😁 And then, ask them to send you their file after your interview editing.
Don’t be too quick to claim victory! Having great equipment to make recordings is not enough. You really need to trust their expertise (or their taste in audio mixing) because you won’t hear the recording on their software before they send it to you. 😬 In any case, it is smart for you to record a double on your side, on your software, just as a back-up.

What equipment to record a podcast remotely? 🎙️
As we said before, we strongly advise you to have a good microphone and not use the microphone of your computer. This would result in poor sound quality. Even if we know that it could be tempting to choose the audio equipment already provided by your computer.
Depending on your budget, there are different types of microphones:
- Blue Yeti (150€): This is the classic microphone for podcasters. Very practical because it is very easy to use, the Blue Yeti plugs into your computer via USB. It is also equipped with volume and gain buttons which gives it a fairly accurate sound. Be careful with your studio environment because it picks up all the little noises.
- Bird UM-1 (60€): If you don’t want to spend a lot of money on your equipment to record a podcast remotely, this fixed microphone is a good alternative. Very easy to install, you won’t be confused by complex features. But be careful: to use it properly, you need to buy a microphone stand and a pop filter to avoid recording too many unnecessary sounds.
- Rode NT-1 (160€): If this mic is a little more expensive than the others, it is also one of the most recommended mics for podcasters. The sound quality is almost perfect. Its advantage: it offers a warm sound and a real clarity. A must for podcasters– You do not need to be a high-ender to invest in something as crucial to your show as this!
To learn more about what kind of microphone you should purchase to record a podcast, you can read our article!
You may want to also consider using an audio mixer in your remote production setup. 🎛️
With an audio mixer, you can control the attributes of the sound as it comes through the input. This is really important for remote podcast production because chances are, the treatment your voice needs on a non-remote mic is probably much different than the treatment your guest’s voice needs on a remote phone or computer.
One of the big benefits of using a mixer is that then you do not have to spend as much time editing the voice quality in post. ⏱️
Some podcast-specific audio mixers, like the PodTrak8 and the RodeCaster Pro, even have BlueTooth, USB, or TRRS inputs so your guest’s call on your phone can connect directly into the mixer. 🤩
Plus, with mixers, you can pause recording if there is an interruption (it feels like there is always an interruption when doing remote production) and you can turn down the volume of your guest’s mic as you talk so their noisy background does not cover your voice. And you can cue up the intro/outro music to play on your mixer so your guest can hear both and feel present as if they were in the studio recording with you!
To record a podcast remotely, choose your room carefully
There are some very simple tricks to optimize the sound of your podcast. One of them is to isolate yourself in a small room with a lot of furniture, pillows, clothes… to reduce the echo. 🗣️
If you ask the podcasters you know, you would be surprised about how they record their episodes. Some of them interview their guests sitting in their closet or inside their dressing room. Others under a blanket. 😂
The ultimate goal is to minimize the reverberation effect that you might pick up in a room that is too big and not well furnished. But it’s not enough to be in an acoustic room yourself, your guest(s) must be as well. Before you start your remote recording, make sure you explain to them the conditions you want.
To help you, here is a list of things to remember before you press “Record”: ⏺️
- Ask people around you to be quiet during the remote recording
- Put the phone on silent
- Avoid tapping on the table, playing with paper, or eating while recording.
- Provide a glass of water to avoid too much mouth noise.
- If you use a video app, inform your guests and/or warn them that they will be recorded (they may have planned to stay in their pajamas that day!)
- Send a Google Calendar invitation to your guests and kindly ask them to warn the relatives who live with them (so that they avoid noisy activities at that time, like vacuuming the next room…)
Tips for guests on VIDEO remote podcast interviews
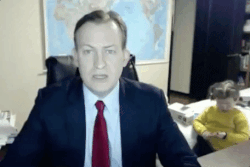
Just like your guest may not be an audio tech whiz, they probably do not know much about what goes into making a great video interview. If you are doing a remote interview with video, you want to send tips along to your guests, even if they will only be using the built-in camera on their laptop.
Lighting is critical
Your remote guest needs plenty of light on their face for the interview, usually more light than they would typically be comfortable sitting in. 🔦
Tell your guest to sit facing a sun-filled window and put the recording laptop between the window and them. If that is not possible, have them put a lamp where the window would be instead.☀️
In the case that this main light creates shiny spots on their face, they can try to move away from the light a little bit, or they can put on a little bit of make-up powder.
If there are any shadows on the face, they should add a light in a position that gets ride of them. Sometimes turning up the brightness of a laptop can act as a light.
Also, they should make sure that there is nothing super bright or shiny in their background. You do not want the viewers to be distracted by the glare. 😎
How to Position Yourself
Let your remote guest know that it looks best if a wall is not directly behind them. Having space is good. It might feel unnatural to sit smack dab in the middle of a room, but it is probably the best place to sit. ↔️
You will also want to let your guest know if you want to only see their shoulders and up, or if their whole torso will be showing. By letting them know a head of time, they can prepare their space and their wardrobe better… speaking of wardrobe…
What to Wear for a Remote Video Interview
Since they are your guest, you probably do not want to sound bossy by telling them what exactly to wear. But there are some tips that they might appreciate. For example, silky shirts tend to glare under the level of light needed for good video.. they also tend to show sweat under those same lights. 🥵
Shirts with fine patterns usually show up weird on camera, like the electrical version of “Magic Eye.” Also, plain white shirts can cause problems for a camera because the camera may try to automatically try to white balance off of it with sub-optimal results.
Let them know solid colors (as well as black) are usually the best, with no logos. Remind them that if they are planning on wearing headphones, earrings can get really uncomfortable.
But of course the most important thing is that they have an awesome experience on your show so in the end they should wear whatever the are most comfortable in! 💃
How can I be a good remote interview host?
Some times it can feel difficult to conduct a really good interview remotely, especially if you are used to doing it in person.
In person, it is easier to add a human touch. You get to meet the person… well… in person. 🤝
Plus, you get to have the setup already ready to go. When you are remote, you have to coach your guest through all the technical setup, their positioning, their lighting, etc.
But it is still possible to be great at hosting a remote interview! There are some hacks that work well. ⚒️
Do a pre-interview
A pre-interview is when you talk to a potential guest before the production day to make sure you are both on the same page in terms of expectations and fit. 📞
It can be helpful to do the pre-interview in roughly the same way you will do the actual interview. If it is going to be a video interview, try to do a pre-interview on the same software as you plan to do the real interview. If it is going to be an audio-only interview, try to use the same phones and recording technology that you will both be using on the real interview. That way the pre-interview acts a low level equipment test run for everyone.
A pre-interview is especially important for remote interviews in terms of building rapport. You can get to know each other. You can learn each other’s sense of humor, conversation style, and even outside interests. 🤓
It is also a good opportunity for the guest to give input in what the remote interview will cover. Having guest input ahead of time is super helpful in terms of making sure you cover the full breadth and depth of what they have to offer during an interview.
Send detailed instructions ahead of time
Send your guest excellent written instructions ahead of time. You should spell out every clearly, step by step. Include everything they need to know about the equipment, the setup… everything! Have a friend who does not know anything about making podcasts read your instructions and give you feedback about what is clear and unclear. Of course you should also make it clear in the instructions that you will be there to help them through every single step so they do not need to stress. 💆
Clear instructions ahead of time help ease your guest’s anxiety about the interview. It helps them feel confident that they can do this! Of course it also helps the production because they have the tools they need to come in prepared.
On the other hand, it can also weed out potential guests who are not up to the challenge. It is better to know ahead of time if someone is going to flake, then for you to get all set up on your end and then they bail under the excuse that they did not realize what they signed up for. Of course, still be courteous if they do bail! 🤵
Send Interview Questions Ahead of Time
Send your guest a list of interview questions ahead of time. Again, this helps them feel prepared and confident ahead of time. It will also increase the quality of the show’s content.
Remember, interviews are not interrogations or tests. They are an opportunity for you, the host, to pull out as much information and character from your guest as possible.👩🎤
If you want, you can ask the guest to send you abbreviated answers to the questions ahead of time so you get a feel for what direction they want to go in, and so that you can make sure they cover during the interview that they wanted. It is common for guests to forget some points they wanted to cover, especially when it is a remote interview and their mind has been focused on the technical setup.
You can also offer to add or remove questions based on recommendations from the guest. This can help get rid of questions that would produce “meh” answers and add content that will really knock your listeners’ socks off. 😲
Most importantly, this gesture helps build trust between you and your guest. Mutual trust will help, especially in a remote situation that can feel really isolating for both the host and the guest.
Don’t sweat the small stuff
There is a lot that cannot be controlled in a remote interview. Dogs bark, babies cry, and construction happens. 🚧
Do not let this rattle you. Do not let it rattle your guest. Assure them that many things can be fixed in editing, plus what they are saying is so good that the audience will not notice a thing. If there is a loud noise while one of you are talking, just take a beat and start over on the thought once the sound has passed.
When you are setting everything up with them right before recording, give them general direction and feedback, but judge the situation and their response before giving too much. A perfect audio and/or visual recording It is not worth them getting flustered or self-conscious. Just like in ‘real life,’ you audience cares more about the guest’s authenticity and confidence, than perfection. 🤘
What software should I use to record a podcast remotely?
With the Covid-19 pandemic, the number of software to record a podcast remotely has multiplied. In addition to the timeless Skype and Zoom, there are now tools such as Zencastr, Squadcast, or Riverside.fm. 😁
Let’s take a look at these different platforms to see which one suits your podcasting best.

Zencastr
Be careful, don’t forget the “r” otherwise it will send you to another solution. Zencastr is an
online tool that does not require any download. It is a free basic version but if you
choose the paid version, you will be able to enjoy other features.
The benefits of Zencastr to record a podcast remotely:
- This software is very visual and user-friendly, so it is easy to use (convenient for your interviewee)
- Each guest is recorded on a separate sound track
- With the free version, you get your files in mp3 (with compressed sound). With the paid version, you can recover your files in wav.
- The free version is limited to 2 guests. It’s unlimited with the paid version.

The disadvantages of Zencastr for recording a podcast remotely:
- If you or one of your guests has an internet connection issue, you will lose the files. Yes, including your guest’s because the file is saved on their computer during the interview before being uploaded to the site at the end of your session
- At the end of the session you must ask your guests not to immediately close their laptop while the files are loading into the platform – otherwise you will lose them.
Price Plans:
- Free:
- Unlimited Audio and Video Recording
- Unlimited Audio Uploads
- Unlimited Audio Hosting
- Up to 12 Participants per Recording
- Unlimited Separate Track Recordings
- Record High-Quality 128k MP3
- Record in 1080p Video Quality
- 90 Days of Recording Masters Storage
- 1hr Postproduction Credit/mo AI Video Layouts
- Audio and Video Embed Player
- Up to 750 Zencastr Video Views/mo.
- Professional ($20/month): Everything in Free, plus:
- Unlimited 16-bit 48k WAV Recordings
- Unlimited Recording Masters Storage
- Unlimited English Transcriptions
- Unlimited Live Editing Soundboard
- Customize / Remove Watermark
- 1080p Video RSS (750 dl/mo)
- 10hrs Postproduction Credits/mo
- Advanced Show Analytics
- Edit with Smart Filters
- Sync with Google Drive/Dropbox
- Growth ($49/monoth): Everything in Pro, plus:
- Record in 4K Video Quality
- 20hrs Postproduction Credits/mo
- 1080p Video RSS (1K dl/mo)
- Up to 10K Video Views/mo
- Up to 2 Shows Hosted
- 3 Team Members
- 50K Brand Page Impressions
- Campaign Analytics
- Shortlink Attribution
- Pageview Tracking Attribution
- Automatic Coupon Management
- Campaign Builder
- Conversion Tracking Attribution
- Host-Read Advertising Management

Zoom
Another big winner of the Covid-19 crisis, Zoom is one of the most used remote video call and meeting software in the world. Both in the professional world and in everyday life, to chat with loved ones who live far away.
In the podcast industry, many content creators have chosen Zoom to record their episodes remotely. Here are the pros and cons of this software.
Very practical and user-friendly, as long as you install it, a free basic version and then paid subscriptions to get unlimited meeting time for example (they did not offer free during the quarantine though).
The benefits of Zoom to record your podcast remotely:
- Good network quality
- You can share your screen (to comment on a movie poster together, for example)
- (our favorite feature on the team 😂) you can put a virtual background (beach, moon…) and even upload your own file
- International customer service team and multilingual support
- You can record the conversation (M4A audio and MP4 video) directly with the app and the audio is automatically extracted from the video
- You can record a separate track for each participant but you have to (knowing beforehand) configure it in the recording settings
The disadvantages of Zoom to record your podcast remotely:
- In the free version, the meetings are limited to 40 minutes, you have to upgrade to Pro at 14€/month to move to a 24 hour time limit
- The guest must download the application and understand that he/she must click on the link of your invitation that you send by email or sms
- The guest must have configured their account to allow you to register, if this is not done you will spend a few minutes explaining how to allow them in…
Read our article for more information about how to record a podcast over Zoom.
Price Plans
- Basic (free):
- Meetings up to 40 minutes per meeting
- 100 Attendees per meeting
- Whiteboard 3 included
- Team Chat
- Beta Mail & Calendar
Client
- Pro ($130/year):
- Meetings up to 30 hours per meeting
- 100 Attendees per meeting
- Whiteboard 3 included
- Team Chat
- Beta Mail & Calendar- Client
- Cloud Storage 5GB
- New Essential Apps Free premium apps for 1 year (terms apply)
- Business ($189/year):
- Meetings up to 30 hours per meeting
- 300 Attendees per meeting
- Whiteboard Unlimited
- Team Chat
- Beta Mail & Calendar- Client
- Cloud Storage 5GB
- New Essential Apps Free premium apps for 1 year (terms apply)
- Extras SSO, managed domains & more
Skype
Let’s continue with the most famous of video call software of all time: Skype. Almost everyone has it or knows it. Free, it often suffers from a bad connection because there are too many users and calls at the same time.
The benefits of using Skype to record podcasts remotely:
- Skype is a safe bet that everyone knows. So it’s very easy to offer this alternative to your interviewees
- It is an easy to use software
- You can share your screen with your contacts.
- You can also record your call and, if the internet cuts out, you can have the file uploaded directly to your computer.
The disadvantages of using Skype to record a podcast remotely:
- You can record only the audio or also the video. But, in all cases the file will be in MP4 format (so you will have to extract the audio and convert it). If you don’t want to do this, you need to add an additional application to Skype like Ecamm recorder (which is a freemium software).
- The recording is only done on one track. It is therefore quite problematic if you speak at the same time and it is difficult to manage the audio mix according to the recording conditions of each speaker.
Read our article for more information about how to how to record a podcast over Skype.
Price Plans
There are not really price plans for Skype. The software is free to download and then you pay per call. Skype to Skype calls are free. Skype to Phone calls in the US are about $2/month subscription.

Riverside.fm
A newcomer to the recording software market, Riverside.fm is a paid platform that was launched in 2020. Let’s find out its pros and cons together.
The benefits of Riverside.fm to record a podcast remotely:
- At the end of your recording, you can download your audio and video files in .wav format (more qualitative than .mp3 format).
- Riverside.fm is very easy to use.
- The platform is full of innovative features like call recording, live streaming to social media, and video editing in your browser.
The disadvantages of Riverside.fm to record a podcast remotely:
- Be careful the files you download from Riverside.fm are very large.
- The number of hours recorded is limited and increases according to the subscription you choose.
- Since the platform is fairly new, there may be some bugs but nothing that really impacts the recording of your podcast remotely.
Price Plans:
- Free:
- 2 hours of separate audio & video tracks (one-off)
- Unlimited single track recording and editing ⓘ
- Watermark on exported files
- Up to 720p video quality
- 44.1 kHz audio quality
- Unlimited video calls
- Standard ($15/month):
- 5 hours of separate audio & video tracks (one-off)
- Unlimited single track recording and editing ⓘ
- Watermark on exported files
- Up to 720p video quality
- 44.1 kHz audio quality
- Unlimited video calls
- No watermark on exported files
- Up to 4K video quality
- 48 kHz audio quality
- Screen sharing
- Live streaming to social media
- Pro ($24/month):
- 15 hours of separate audio & video tracks (one-off)
- Unlimited single track recording and editing ⓘ
- Watermark on exported files
- Up to 720p video quality
- 44.1 kHz audio quality
- Unlimited video calls
- No watermark on exported files
- Up to 4K video quality
- 48 kHz audio quality
- Screen sharing
- Accept live call-ins
- Unlimited transcriptions
- Live chat support

Squadcast
Squadcast aims to be one of the best remote podcast interview platforms.
The benefits of Squadcast to record a podcast remotely:
- Squadcast offers a waiting room that allows you to make sure your guests are ready and that everything is running smoothly on their side (and yours).
- Each audio track is recorded separately, which makes post-production easier.
- Your files are downloaded automatically. So you have very little risk of losing them.
- You can download your files in .wav and .mp3 formats.
- Squadcast records up to 4 people at the same time on the platform.
The disadvantages of Squadcast to record a podcast remotely:
- As with Riverside.fm, the number of hours recorded is limited and increases depending on the subscription you choose.
- The platform is the most expensive of all those we have just seen.
Price Plans
- Indie ($20/month):
- 5 Hours Audio Recording Per Month
- 1 Show
- 2 Team Member Seats
- 3 Mainstage Participants
- 3 Backstage Participants
- 1 Integration + Zapier
- Iso & Mix Audio Tracks
- Pro ($40/month)
- 12 Hours Video Recording Per Month
- 3 Show
- 5 Team Member Seats
- 5 Mainstage Participants
- 5 Backstage Participants
- 2 Integration + Zapier
- Iso & Mix Audio Tracks
- Video + Screen Recording
- Studio ($80/month)
- 25 Hours Video Recording Per Month
- 10 Show
- 10 Team Member Seats
- 10 Mainstage Participants
- 10 Backstage Participants
- Unlimited Integration + Zapier
- Iso & Mix Audio Tracks
- Video + Screen Recording
- Master Audio w/Dolby Voice
And one last tip for the road: 😎 Be careful not to put your interviewee on speaker, ideally connect 2 pairs of headphones (with a double-jack) and configure your computer so that the interviewee’s sound comes out of one pair of headphones and your own voice from the other.
Put each pair of headphones in your ears and you have recreated a stereo feedback system that is quite useful for recording!
Remember, here are the things you need to pay special attention to before recording your podcast:
- Your audio equipment
- The surrounding sound
- Room acoustics
- Registration limit (either by number of hours registered or by number of guests registered on the platform)
- If the audio tracks are recorded separately or not
- The format of your audio files (.wav being the best)
Now you know how to record a podcast remotely and how to ensure that your sound is of the highest quality!
Summary
This has been a beast of a blog post so to wrap up, we are going to summarize the main points.
People are used to remote recordings now 😀
First, because of the pandemic, potential guests and even listeners are more used to remote recordings. This works in your favor. Not only are potential guests more likely to know the basics of remote audio and video conversations and recording, but listeners know what level of quality to expect and base their expectations on it.
Good equipment matters 🎙️
Second, pick good equipment. If you can, provide your guest with equipment or at least equipment suggestions based on what they may already have around the house. For you, good equipment means an excellent microphone, possibly a mixer, and of course solid editing software you can count on.
Prepare your guest well ✍️
Third, give your remote guest as much information and instructions you can ahead of time. Cover everything from lighting and wardrobe tips (if it is a video interview) to questions and content. Make an effort to build rapport with them during this phase. Building trust and a clear communication pattern is vital.
Take a breath 🧘
Fourth, relax. No, this will not be perfect. Enjoy the podcasting process. Make sure your guest does too. The rest will follow naturally.
Choose the right platform for you 💻
Fifth, pick the remote interviewing platform that best fits your needs. They all have benefits and drawbacks so do your research. Do not be afraid to make a switch if you need to. The top choices are Zencastr, Zoom, Skype, Riverside, and Squadcast.

Launch your podcast with Ausha
All-in-one platform to easily launch and grow your podcast.
Start for Free